Spring… i na wiosnę, i na lato – Część 1
Postaram się w dzisiejszym wpisie ogarnąć nieco temat framework’a Spring. Zacznijmy więc może od tego, czym on jest. Omnipotentna Wikipedia podpowiada nam, iż Spring jest narzędziem do tworzenia aplikacji (ang. application framework) w języku Java, zarówno dla platformy web, jak i stand-alone. Zatem spróbujemy dzisiaj stworzyć pierwszą aplikację webową w oparciu o Spring’a.
Przygotowanie środowiska
Zacznijmy więc przygodę od pobrania i rozpakowania narzędzia SpringSource Tool Suite. Jest to dostosowany do potrzeb Eclipse, więc obsługa nie powinna nastręczać żadnych problemów. Jako, że przy muzyce stanowczo milej się uczy, pracuje i czeka na ściągnięcie 350 megabajtowego archiwum, w tle pobrzękuje sobie Joe Bonamassa 🙂
Po pobraniu pliku, w moim przypadku springsource-tool-suite-2.9.2.RELEASE-e3.7.2-win32.zip, rozpakowujemy go sobie gdzieś na dysku i robimy na Pulpicie skrót do springsource\sts-2.9.2.RELEASE\STS.exe, który będzie wygodniejszy, od skakania po katalogach za każdym razem, gdy zachce się nam go odpalić.
Czy to już koniec? Cóż, jeśli chodzi o IDE i narzędzia to tak. Przygotujemy sobie jednak zawczasu prostą bazę danych.
Żeby nie było za prosto, jako serwer bazy danych wykorzystam maglowanego ostatnio w pracy Firebird’a. Ściągam więc go sobie i instaluje, ale to już chyba każdy zrobić potrafi, więc szczegóły pominę szczególnie, że możecie powalczyć z jakąś swoją ulubioną bazą danych.
Gdy już serwer stoi, tworzymy w nim prostą tabelę naszą testową, czy to z palca, czy z GUI, znaczenia nie ma najmniejszego.
1
2
3
4
5
6
7
8
9
10
11
CREATE TABLE CUSTOMER
(
  ID Numeric(18,0) NOT NULL,
  EMAIL Varchar(255),
  FIRST_NAME Varchar(255),
  LAST_NAME Varchar(255),
  PRIMARY KEY (ID)
);

GRANT DELETE, INSERT, REFERENCES, SELECT, UPDATE
 ON CUSTOMER TO  SYSDBA WITH GRANT OPTION;
Dodajemy generator:
1
CREATE GENERATOR CUSTOMER_GEN_SEQ;
Oraz dane testowe:
1
2
INSERT INTO CUSTOMER (ID, FIRST_NAME, LAST_NAME, EMAIL) VALUES ('1', 'Jan', 'Kowalski', 'example.com');
INSERT INTO CUSTOMER (ID, FIRST_NAME, LAST_NAME, EMAIL) VALUES ('2', 'Adam', 'Nowak', 'example1.com');
Pierwszy projekt
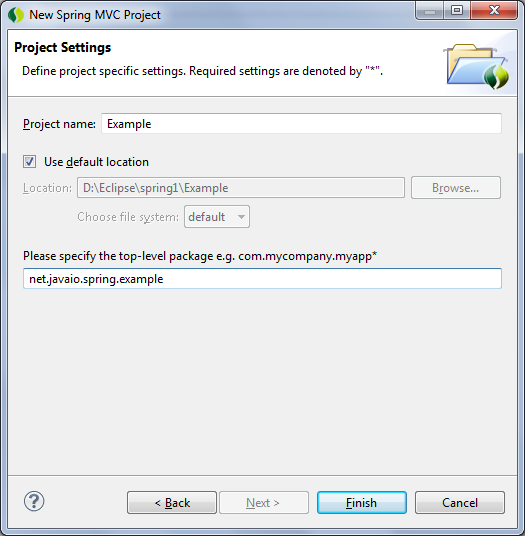
Zatem zakasamy rękawy i tworzymy nowy projekt, licząc na to, że Java 1.7 z której korzystam nie położy nam framework’a….
Wybieramy zatem Spring MVC Project z menu File -> New -> Spring Template Project
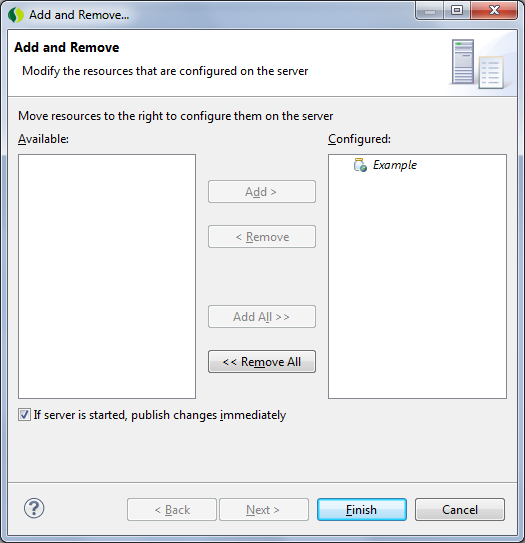
Wygląda na to, że coś się nam tam udało. Teraz trzeba zobaczyć, czy to cudo nam zadziała. Żeby to zrobić, w okienku Servers klikamy prawym na jedynym serwerze i wybieramy Add and Remove… po czym dodajemy nasz nowy projekt Example.
Cacy, pięknie, wciskamy na serwerze Play… i już na dzień dobry mamy babola:
1
2
3
4
5
6
7
8
9
10
11
12
13
14
15
16
17
18
19
20
21
22
23
24
25
26
SEVERE: Exception sending context destroyed event to listener instance of class org.springframework.web.context.ContextLoaderListener
java.lang.ExceptionInInitializerError
	at org.springframework.web.context.ContextLoaderListener.contextDestroyed(ContextLoaderListener.java:144)
	at org.apache.catalina.core.StandardContext.listenerStop(StandardContext.java:4819)
	at org.apache.catalina.core.StandardContext.stopInternal(StandardContext.java:5466)
	at org.apache.catalina.util.LifecycleBase.stop(LifecycleBase.java:232)
	at org.apache.catalina.util.LifecycleBase.start(LifecycleBase.java:160)
	at org.apache.catalina.core.ContainerBase.addChildInternal(ContainerBase.java:895)
	at org.apache.catalina.core.ContainerBase.addChild(ContainerBase.java:871)
	at org.apache.catalina.core.StandardHost.addChild(StandardHost.java:615)
	at org.apache.catalina.startup.HostConfig.deployDescriptor(HostConfig.java:649)
	at org.apache.catalina.startup.HostConfig$DeployDescriptor.run(HostConfig.java:1585)
	at java.util.concurrent.Executors$RunnableAdapter.call(Unknown Source)
	at java.util.concurrent.FutureTask$Sync.innerRun(Unknown Source)
	at java.util.concurrent.FutureTask.run(Unknown Source)
	at java.util.concurrent.ThreadPoolExecutor.runWorker(Unknown Source)
	at java.util.concurrent.ThreadPoolExecutor$Worker.run(Unknown Source)
	at java.lang.Thread.run(Unknown Source)
Caused by: java.lang.IllegalStateException: org.slf4j.LoggerFactory could not be successfully initialized. See also http://www.slf4j.org/codes.html#unsuccessfulInit
	at org.slf4j.LoggerFactory.getILoggerFactory(LoggerFactory.java:282)
	at org.slf4j.LoggerFactory.getLogger(LoggerFactory.java:248)
	at org.apache.commons.logging.impl.SLF4JLogFactory.getInstance(SLF4JLogFactory.java:155)
	at org.apache.commons.logging.impl.SLF4JLogFactory.getInstance(SLF4JLogFactory.java:131)
	at org.apache.commons.logging.LogFactory.getLog(LogFactory.java:272)
	at org.springframework.web.context.ContextCleanupListener.<clinit>(ContextCleanupListener.java:43)
	... 16 more
Research u wujka Google podpowiada nam, że to może być problem z wersją biblioteki Log4j i należy podnieść domyślny numer wersji z 1.2.15 do 1.2.16. W związku z tym należy wyedytować pliczek pom.xml i upewnić się, że numer wersji będzie prawidłowy:
1
2
3
4
5
		<dependency>
			<groupId>log4j</groupId>
			<artifactId>log4j</artifactId>
			<version>1.2.16</version>
			...
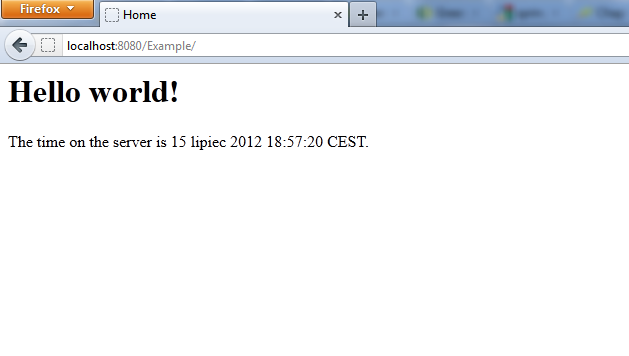
Zapisujemy zmiany i magiczny Maven robi za nas całą resztę. Wciskamy więc Play po raz wtóry i okazuje się, że serwer startuje już bez żadnych więcej błędów, a na dodatek, pod odpowiednim adresem mamy działający przykład.
Czas na własny kontroler
Czy jest kontroler? Otóż adnotacja @Controller informuje Spring’a, że klasa, którą taką adnotacją oznaczyliśmy będzie zawiadywać sposobem przetwarzania i wyświetlania danych w naszym serwisie. Po szczegóły zapraszam do Spring’owego Bloga i artykułu GREEN BEANS: GETTING STARTED WITH SPRING MVC.
Stworzony przez kreatora HomeController zostawiamy sobie w spokoju, a obok niego dodajemy nasz własny CustomerController:
1
2
3
4
5
6
7
8
9
@Controller
public class CustomerController {

	@RequestMapping(value = "/customer", method = RequestMethod.GET)
	public String home(Locale locale, Model model) {

		return "customer_list";
	}
}
Oznaczamy klasę adnotacją @Controller i dodajemy metodę home(…). Nazwa metody może być dowolna, znaczenia mają tutaj natomiast: adnotacja @RequestMapping, która mówi kontenerowi jaką ścieżkę adresu metoda owa będzie obsługiwać; lista parametrów, której znaczenie możemy odnaleźć w czeluściach Spring’owego Blog’a; oraz zwracany przez ową metodę String. Nadmienię tylko, iż nie musi być to String, a na przykład instancja klasy ModelAndView… ale to temat nie a ten moment.
Cóż mówi kontenerowi ten zwracany przez nas “customer_list”? Mówi, jaki plik byśmy chcieli wyświetlić. Mogłaby być to ścieżka do pliku, jednak w pliku /Example/src/main/webapp/WEB-INF/spring/appServlet/servlet-context.xml mamy domyślnie wygenerowaną konfigurację, która do zwracanego przez nas ciągu znaczków dokleja coś z przodu i coś z tyłu, i w efekcie powstaje nam z tego ścieżka, w której kontener będzie poszukiwał pliku widoku, do którego się odwołać chcemy.
1
2
3
4
5
	<!-- Resolves views selected for rendering by @Controllers to .jsp resources in the /WEB-INF/views directory -->
	<beans:bean class="org.springframework.web.servlet.view.InternalResourceViewResolver">
		<beans:property name="prefix" value="/WEB-INF/views/" />
		<beans:property name="suffix" value=".jsp" />
	</beans:bean>
W naszym wypadku będzie to /WEB-INF/views/customer_list.jsp, którego nie mamy, a który trzeba by stworzyć.
1
2
3
4
5
6
7
8
9
10
11
12
<%@ page language="java" contentType="text/html; charset=ISO-8859-1"
pageEncoding="ISO-8859-1"%>
<!DOCTYPE html PUBLIC "-//W3C//DTD HTML 4.01 Transitional//EN" "http://www.w3.org/TR/html4/loose.dtd">
<html>
<head>
<meta http-equiv="Content-Type" content="text/html; charset=ISO-8859-1">
<title>Insert title here</title>
</head>
<body>
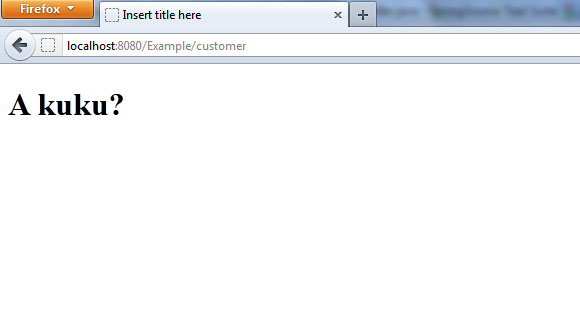
<h1>A kuku?</h1>
</body>
</html>
Restart serwera, wejście na stronę i naszym oczom ukazuje się:
Kolej na usługę
Wiemy już pi razy drzwi, jak działa kontroler. Teraz przydałoby się zejść nieco głębiej. Spring oferuje nam kilka adnotacji, które pozwalają nam odróżnić poszczególne poziomy funkcjonalności od siebie, a samemu kontenerowi dają też wskazówki, jak powinny one być przez niego traktowane. I tak oto wyróżniamy @Controler, @Service, @Repository i @Component. Szczegóły wynikające z różnic pomiędzy nimi opisuje inny artykuł, jednakże pokrótce można podsumować je tak:
1
2
3
4
5
6
| Annotation | Meaning                                             |
+------------+-----------------------------------------------------+
| @Component | generic stereotype for any Spring-managed component |
| @Repository| stereotype for persistence layer                    |
| @Service   | stereotype for service layer                        |
| @Controller| stereotype for presentation layer (spring-mvc)      |
Dla uproszczenia stworzymy na początku usługę zwracającą zawsze ten sam obiekt, CustomerService.java:
1
2
3
4
5
6
7
8
9
10
11
12
13
14
15
16
17
@Service
public class CustomerService {

	private final Customer customer = new Customer("Jan", "Kowalski", "example.com");

	public Customer getCustomerById(Long id) {
		return customer;
	}

	public List<Customer> getAllCustomers() {
		return Arrays.asList(customer);
	}

	public Customer createCustomer(String firstName, String lastName, String email) {
		return customer;
	}
}
Oraz nasze proste DTO w postaci klasy Customer.java:
1
2
3
4
5
6
7
8
9
10
11
12
13
14
15
16
17
18
19
20
21
22
23
24
25
26
27
28
29
30
31
32
33
34
35
36
37
38
39
40
41
42
43
44
45
46
47
48
49
50
51
52
53
54
55
56
57
58
59
60
61
62
63
64
65
66
67
68
69
70
71
72
73
74
75
76
77
78
79
80
81
82
83
84
85
86
87
88
89
90
91
92
93
94
95
96
97
98
99
100
101
102
103
104
105
106
public class Customer implements Serializable {

	/**
	 *
	 */
	private static final long serialVersionUID = -7801982418517678583L;

	private Long id;

	private String firstName;

	private String lastName;

	private String email;

	public Customer() {
	}

	public Customer(String firstName, String lastName, String email) {
		this.firstName = firstName;
		this.lastName = lastName;
		this.email = email;
	}

	public Long getId() {
		return id;
	}

	public void setId(Long id) {
		this.id = id;
	}

	public String getFirstName() {
		return firstName;
	}

	public void setFirstName(String firstName) {
		this.firstName = firstName;
	}

	public String getLastName() {
		return lastName;
	}

	public void setLastName(String lastName) {
		this.lastName = lastName;
	}

	public String getEmail() {
		return email;
	}

	public void setEmail(String email) {
		this.email = email;
	}

	@Override
	public int hashCode() {
		final int prime = 31;
		int result = 1;
		result = prime * result + ((id == null) ? 0 : id.hashCode());
		result = prime * result
				+ ((firstName == null) ? 0 : firstName.hashCode());
		result = prime * result
				+ ((lastName == null) ? 0 : lastName.hashCode());
		result = prime * result + ((email == null) ? 0 : email.hashCode());
		return result;
	}

	@Override
	public boolean equals(Object obj) {
		if (this == obj)
			return true;
		if (obj == null)
			return false;
		if (getClass() != obj.getClass())
			return false;
		Customer other = (Customer) obj;
		if (email == null) {
			if (other.email != null)
				return false;
		} else if (!email.equals(other.email))
			return false;
		if (firstName == null) {
			if (other.firstName != null)
				return false;
		} else if (!firstName.equals(other.firstName))
			return false;
		if (id == null) {
			if (other.id != null)
				return false;
		} else if (!id.equals(other.id))
			return false;
		if (lastName == null) {
			if (other.lastName != null)
				return false;
		} else if (!lastName.equals(other.lastName))
			return false;
		return true;
	}

	@Override
	public String toString() {
		return ToStringBuilder.reflectionToString(this);
	}
}
Klasa ToStringBuilder znajduje się w bibliotece commons-lang i żeby ją dodać do projektu, znów musimy wyedytować plik pom.xml, aby dodać do niego nowy wpis:
1
2
3
4
5
6
		<!-- Commons -->
		<dependency>
			<groupId>commons-lang</groupId>
			<artifactId>commons-lang</artifactId>
			<version>2.4</version>
		</dependency>
Skoro mamy już usługę, która coś potrafi zwrócić, zmodyfikujmy nasz kontroler i plik widoku CustomerController.java:
1
2
3
4
5
6
7
8
9
10
11
12
13
14
15
16
@Controller
public class CustomerController {

	@Autowired
	private CustomerService customerService;

	@RequestMapping(value = "/customer", method = RequestMethod.GET)
	public String home(Locale locale, Model model) {

		List<Customer> customers = customerService.getAllCustomers();

		model.addAttribute("customers", customers);

		return "customer_list";
	}
}
W ten sposób kontroler pobierze listę wszystkich udostępnianych przez usługę klientów i przekaże ją do modelu, który z kolei udostępni ją nam w widoku do dalszej obróbki 😉 Również w tym miejscu Spring dostarcza nam kilku adnotacji, a dokładniej @Autowired oraz @Inject, obie opisane tutaj. Cała jednak różnica sprowadza się do tego, iż:
“@Inject does not have a required property unlike Spring’s @Autowire annotation which has a required property to indicate if the value being injected is optional.”
customer_list.jsp:
1
2
3
4
5
6
7
8
9
10
11
12
13
14
15
16
17
18
19
20
21
22
23
24
25
26
27
28
29
30
31
32
33
34
35
36
37
38
39
<%@ page language="java" contentType="text/html; charset=ISO-8859-1" pageEncoding="ISO-8859-1"%>
<%@ taglib uri="http://java.sun.com/jsp/jstl/core" prefix="c"%>
<!DOCTYPE html PUBLIC "-//W3C//DTD HTML 4.01 Transitional//EN" "http://www.w3.org/TR/html4/loose.dtd">
<html>
<head>
<meta http-equiv="Content-Type" content="text/html; charset=ISO-8859-1">
<title>Customer Home</title>
</head>
<body>
	<h1>List of Customers:</h1>
	<c:choose>
		<c:when test="${customers.size() > 0}">
			<table>
				<thead>
					<tr>
						<th>ID</th>
						<th>First name</th>
						<th>Last name</th>
						<th>E-mail</th>
					</tr>
				</thead>
				<tbody>
					<c:forEach items="${customers}" var="customer">
						<tr>
							<td>${customer.id}</td>
							<td>${customer.firstName}</td>
							<td>${customer.lastName}</td>
							<td>${customer.email}</td>
						</tr>
					</c:forEach>
				</tbody>
			</table>
		</c:when>
		<c:otherwise>
			No Customers in database
		</c:otherwise>
	</c:choose>
</body>
</html>
I takim oto sposobem, po restarcie serwera otrzymujemy:
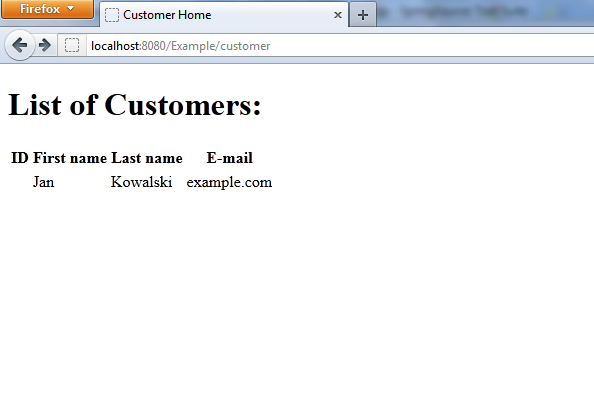
Na deser repozytorium
Stworzymy sobie naprędce repozytorium CustomerRepository.java, które z bazy danych wyciągnie nam dodaną zawczasu testową listę klientów.
1
2
3
4
5
6
7
8
9
10
11
12
13
14
15
16
17
18
19
20
21
22
23
24
25
26
27
28
29
30
31
32
33
34
35
36
37
38
39
40
41
42
43
44
45
46
47
48
49
50
51
@Repository
@Transactional(readOnly = true)
public class CustomerRepository {

	private JdbcTemplate jdbcTemplate;

	@Autowired
	public void setDataSource(DataSource dataSource) {
		this.jdbcTemplate = new JdbcTemplate(dataSource);
	}

	public Customer getCustomerById(Long id) {
		return jdbcTemplate.queryForObject("SELECT id, first_name, last_name, email FROM customer WHERE id = ?", new Object[]{id}, new CustomerMapper());
	}

	public Customer getCustomerByEmail(String email) {
		return jdbcTemplate.queryForObject("SELECT id, first_name, last_name, email FROM customer WHERE email = ?", new Object[]{email}, new CustomerMapper());
	}

	public List<Customer> getAllCustomers() {
		return jdbcTemplate.query("SELECT id, first_name, last_name, email FROM customer", new CustomerMapper());
	}

	@Transactional(readOnly=false)
	public Customer storeCustomer(Customer customer) {

		if (customer.getId() == null) {
			Long newId = jdbcTemplate.queryForObject("SELECT GEN_ID( CUSTOMER_GEN_SEQ, 1) FROM RDB$DATABASE", Long.class);

			customer.setId(newId);

			jdbcTemplate.update("insert into customer (id, first_name, last_name, email) values (?, ?, ?, ?)", customer.getId(), customer.getFirstName(), customer.getLastName(), customer.getEmail());
		} else {
			jdbcTemplate.update("update customer set first_name = ?, last_name = ?, email = ? where id = ?", customer.getFirstName(), customer.getLastName(), customer.getEmail(), customer.getId());
		}

		return getCustomerById(customer.getId());
	}

	private static final class CustomerMapper implements RowMapper<Customer> {

	    public Customer mapRow(ResultSet rs, int rowNum) throws SQLException {
	    	Customer customer = new Customer();
	    	customer.setId(rs.getLong("id"));
	        customer.setFirstName(rs.getString("first_name"));
	        customer.setLastName(rs.getString("last_name"));
	        customer.setEmail(rs.getString("email"));
	        return customer;
	    }
	}
}
Adnotacja @Autowired wstrzyknie nam do metody setDataSource(DataSource dataSource) źródło danych, które skonfigurujemy zaraz poniżej w pliku /Example/src/main/webapp/WEB-INF/spring/root-context.xml. Zadania wewnętrznej klasy CustomerMapper chyba nie muszę omawiać.
Do komunikacji z bazą będziemy używać JdbcTemplate, gdyż jest to nisko poziomowe, klasyczne Spring’owe podejście, a niuansów mieszania JTA, JDBC, Hibernate i transakcji nie chcę w tym wpisie poruszać, gdyż można o nich sobie poczytać tutaj. O samym JDBC zaś tutaj.
root-context.xml:
1
2
3
4
5
6
7
8
9
10
11
12
13
14
15
16
17
18
19
20
21
22
23
24
25
<?xml version="1.0" encoding="UTF-8"?>
<beans xmlns="http://www.springframework.org/schema/beans"
	xmlns:xsi="http://www.w3.org/2001/XMLSchema-instance"
	xmlns:tx="http://www.springframework.org/schema/tx"
	xsi:schemaLocation="http://www.springframework.org/schema/beans
	http://www.springframework.org/schema/beans/spring-beans-3.0.xsd
     http://www.springframework.org/schema/tx
     http://www.springframework.org/schema/tx/spring-tx-3.0.xsd">

	<!-- Root Context: defines shared resources visible to all other web components -->

	<bean id="dataSource" class="org.apache.commons.dbcp.BasicDataSource" destroy-method="close">
		<property name="driverClassName" value="org.firebirdsql.jdbc.FBDriver" />
		<property name="url" value="jdbc:firebirdsql:localhost/3050:d:\spring-db\first.fdb" />
		<property name="username" value="sysdba" />
		<property name="password" value="masterkey" />
	</bean>

	<bean id="txManager" class="org.springframework.jdbc.datasource.DataSourceTransactionManager">
		<property name="dataSource" ref="dataSource"/>
	</bean>

	<tx:annotation-driven transaction-manager="txManager"/>

</beans>
dataSource odpowiada za konfigurację źródła danych, czyli dostępu do naszej bazy. txManager określa menedżera transakcji, którego wykorzystamy w projekcie. Zaś <tx:annotation-driven… /> informuje kontener, iż sposób zarządzania transakcjami określać będziemy przy użyciu adnotacji, np: @Transactional(readOnly=true).
Żeby jednak taka konfiguracja nam zadziałała znów musimy dodać kilka zależności do pliku pom.xml projektu:
1
2
3
4
5
6
7
8
9
10
11
12
13
14
15
16
17
18
19
20
21
22
23
24
25
		<dependency>
			<groupId>org.springframework</groupId>
			<artifactId>spring-orm</artifactId>
			<version>${org.springframework-version}</version>
		</dependency>
		<dependency>
			<groupId>org.firebirdsql.jdbc</groupId>
			<artifactId>jaybird</artifactId>
			<version>2.1.6</version>
		</dependency>
		<dependency>
			<groupId>javax.resource</groupId>
			<artifactId>connector-api</artifactId>
			<version>1.5</version>
		</dependency>
		<dependency>
			<groupId>commons-dbcp</groupId>
			<artifactId>commons-dbcp</artifactId>
			<version>1.4</version>
		</dependency>
		<dependency>
			<groupId>cglib</groupId>
			<artifactId>cglib</artifactId>
			<version>2.2.2</version>
		</dependency>
Aktualizujemy jeszcze tylko usługę CustomerService.java…
1
2
3
4
5
6
7
8
9
10
11
12
13
14
15
16
17
18
19
20
@Service
public class CustomerService {

	@Autowired
	private CustomerRepository customerRepository;

	public Customer getCustomerById(Long id) {
		return customerRepository.getCustomerById(id);
	}

	public List<Customer> getAllCustomers() {
		return customerRepository.getAllCustomers();
	}

	public Customer createCustomer(String firstName, String lastName, String email) {
		Customer customer = new Customer(firstName, lastName, email);

		return customerRepository.storeCustomer(customer);
	}
}
…restart serwera i …Shazam!, mamy naszą testową listę klientów prosto z bazy danych.
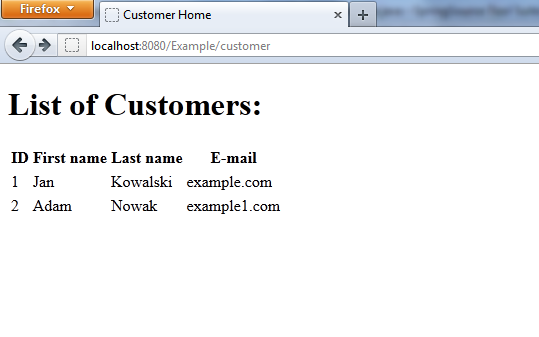
Fin
To tyle, na dzień dzisiejszy. Następnym razem pokażę, jak można coś do naszej bazy wrzucić i wyedytować. Dzięki za uwagę i do następnego!